Draft Guide
Commons Areas/Failures
Clogged Extruder
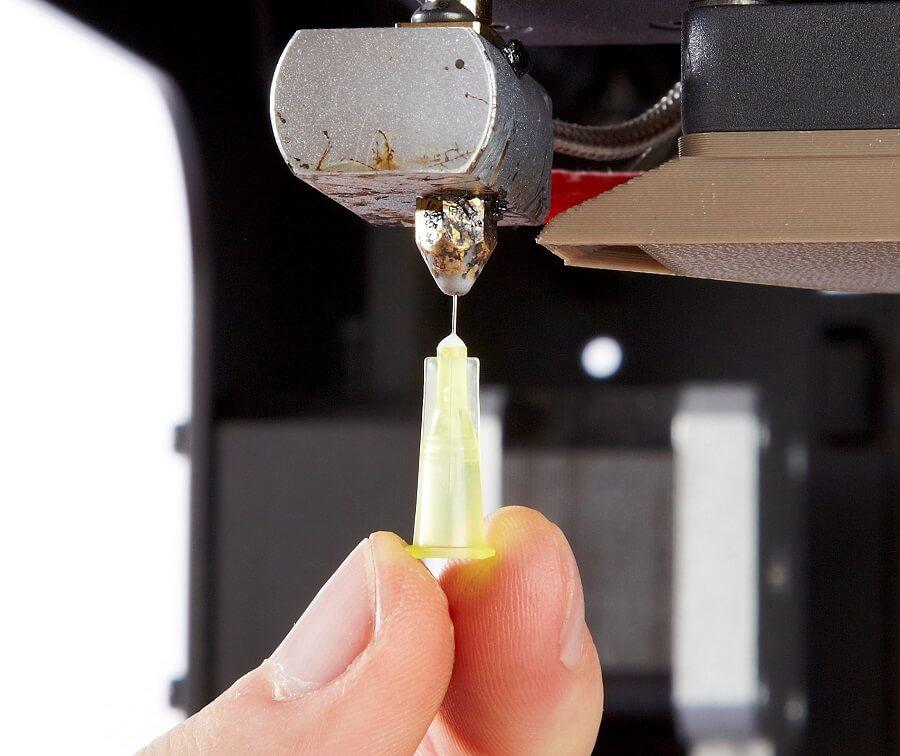
These jams or clogs are usually due to something inside the nozzle that is blocking the plastic from freely extruding may result to extruder no longer able to push plastic through the nozzle.
How to fix:
Dislodge the block in your nozzle with an acupuncture needle, hypodermic needle or an uncoated high-e guitar string. Once you got the clog dislodged, try cleaning filament.
Deformed Prints
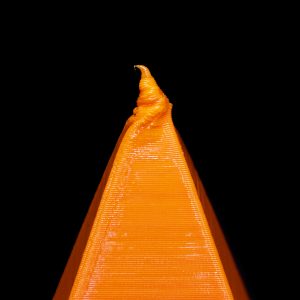
Deformations often occur at the tip or thin ends. The main reason for this problem may be too high of a temperature for the chosen filament which may cause parts of the object to look over-extruded.
How to fix:
Printing in a cooler temperature is the fastest way to resolve. Starting at the lowest point in the recommended range and work your way up in 5°C increments, if needed.
Elephant Foot
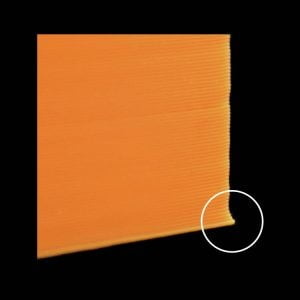
You’ll get to notice typical outgoing bow on the bottom of the print, next to the surface.
How to fix:
Lower the bed temperature. Make sure you’re within the heated bed temperature range advertised by the manufacturer. The highest point in the range should never exceed 10°C below the glass transition temperature. Increase the nozzle to bed distance slightly. If you’re already at the lower end of the heated bed temperature range, you can try increasing the nozzle to bed distance slightly.
Gaps and Holes in the Top Layers

You may notice that the top solid layers of your print are not completely solid where there are gaps or holes between the extrusions that make up these solid layers.
How to fix:
If your infill percentage is very low, there will be large air gaps in your infill. For example, if you are using an infill percentage of only 10%, the remaining 90% of the interior of your part would be hollow, and this would create some very large air gaps that the solid layers would need to print on top of.
If you have tried increasing the number of top solid layers and you are still seeing gaps in the top of your print, you may want to try increasing your infill percentage to see if the gaps go away. For example, if your infill percentage was previously 30%, try using a 50% infill percentage, as this would provide a much better foundation for the solid layers at the top of your print.
Missing Layers
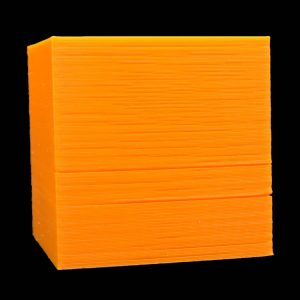
Missing layers are noticeable gaps between the layers. This can be caused by partial under extrusion or by partial or completely skipped layers.
How to fix it:
i) Adjust the nozzle temperature
If you recognize that the extruder sometimes has a hard time to push the filament through the hot end, partly it is because the nozzle is too cold. It can be resolved by raising the temperature by 5-10 degrees so that the plastic flows easier.
ii) Filament diameter settings
The most common filament diameters are 1.75 mm and 2.85 mm but there exist many more. But these measurements have different tolerances which can vary from 0.01 mm to 0.1 mm.
So, make sure you measure your Filament with a calliper on 4 to 5 points on the first meters and calculate the average diameter, before you use it.(Sum of measurements divided my number of measurements)
Use the calculated result, to set either the filament diameter or the extrusion multiplier to the correct value.
The most common method is to set the filament diameter to the standard measurement (1.75 mm, 2.85 mm etc.) and change the amount of extruded material over the extrusion multiplier.
iii) Repair printing file
It may be caused by a damaged or incomplete file too. There are a few options in your slicer program you can choose to repair these problems.
Overheating
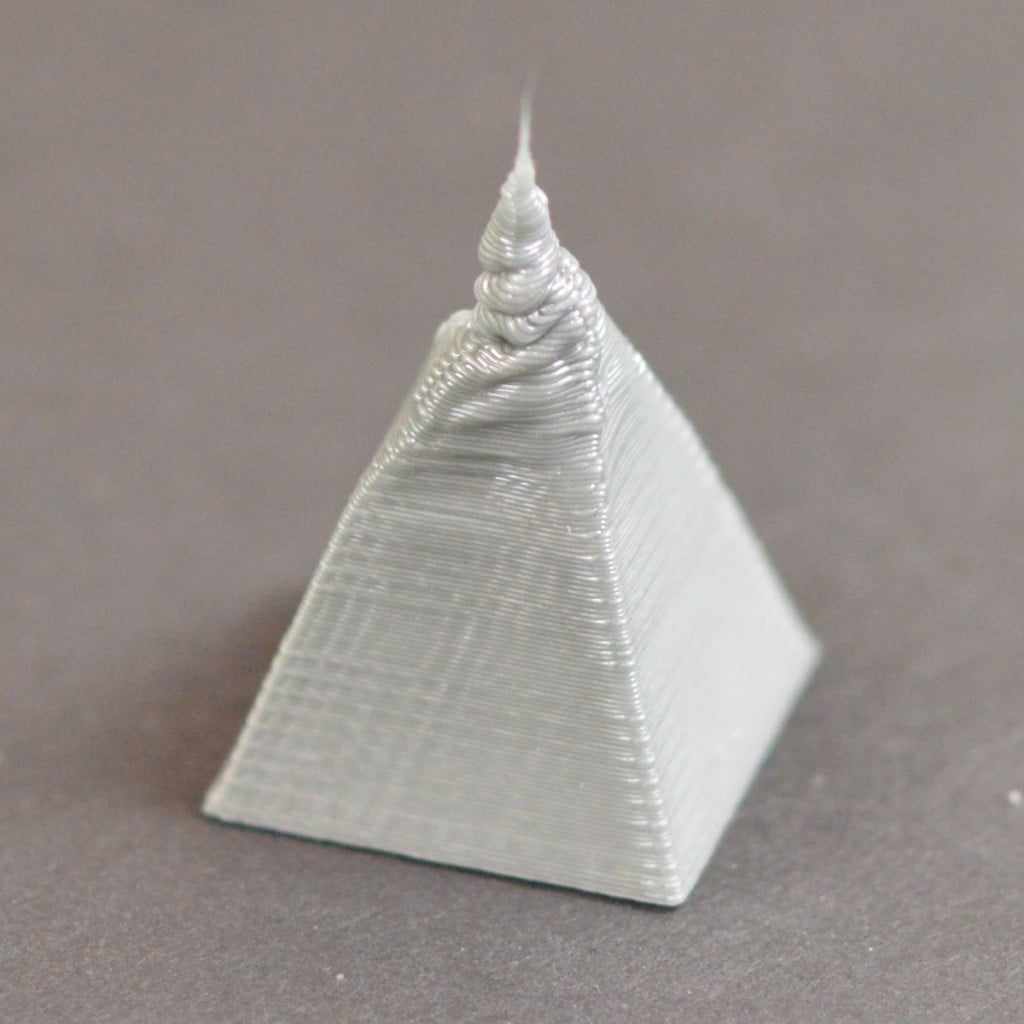
Overheating occurs when the filament has become too hot and isn’t cooling enough. The main cause of overheating is insufficient cooling.
How to fix:
Increase the part cooling fans. If you’re not using 100% part cooling fans you can try increasing up to 100% which should help. However, it may not be suitable for all filaments though so be sure to check the manufacturers recommendations.
Over / Under Extrusion
It will normally occur when your stepper motor is not turning the proper amount of steps, and results in either too much, or too little plastic being extruded. This will lead to ugly and/or brittle parts.
How to Fix:
Recalibrate the steps/mm value of your extruder to ensure your extruder delivers the proper amount of filament requested. Once the steps per mm are set correctly, the next step to a proper calibration is to set your extrusion multiplier (also called feed rate) properly to combat over extrusion 3D printing.
Poor Bridging
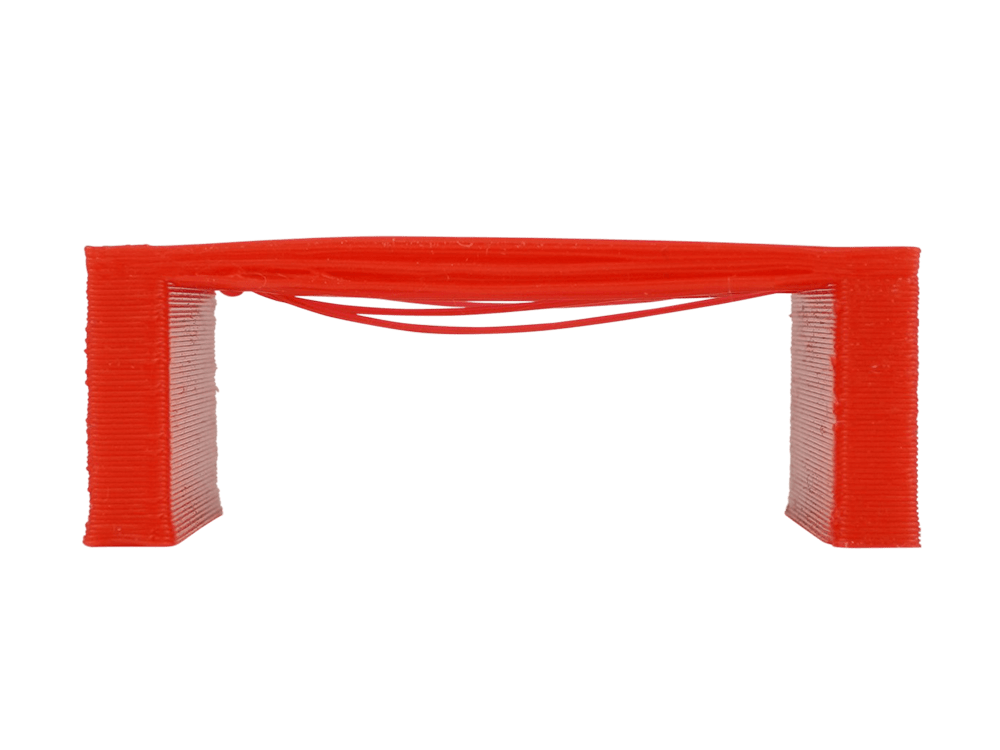
Plastic gets extruded over a gap from one point to another. When bridges are messy, the plastic strings sag. The plastic should be cooled very quick over a gap for a solid connection in-between. For an optimal performance, good calibration in bridging settings and cooling is needed.
How to fix:
Advanced slicer software detects when bridging is required and enables you to apply different settings for the bridge. In resolving this issue after the detection, you can choose to increase extrusion multiplier for the bridge, experimenting at different speed or increase your fan speed for bridges which helps the material to harden quickly without drooping.
Poor Surface Quality Above Supports

When the bottom of an object that was printed above a slicer generated support structure looks rough or even a bit droopy.
How to fix:
The performance can be improved by lowering your layer height which then allows your printer to take smaller steps when creating an overhang.
The other available option is to adjust the density of your support structures by changing the support infill percentage.
Print Not Sticking to Bed
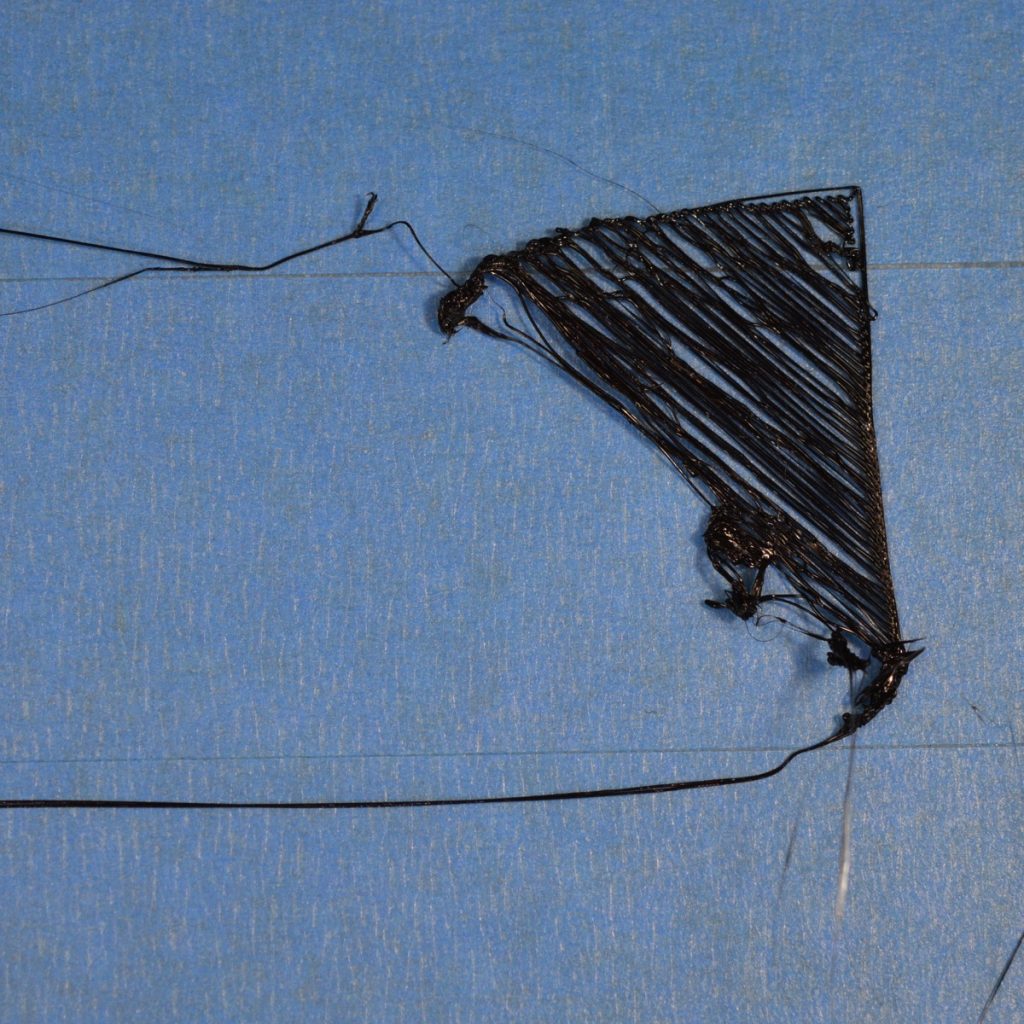
This may be one of the most common issues with many 3D printers. This may be caused by lacking adhesion which might end up with warped print – or no print at all besides a huge mess of tangled filament on your bed.
How to fix:
i) Platform is not level
First to verify whether your printer’s bed is flat and level. If the bed is not level, one side of your bed may be too close to the nozzle, while the other side is too far away. Achieving a perfect first layer requires a level print bed.
Heat up your bed and nozzle to proper printing temperature, retract filament a bit and make sure the nozzle is clean (and no filament is oozing out during the levelling process).Move the heated nozzle to the first corner of the bed. Slide a piece of paper between the bed and the nozzle. Loosen or tighten the bed level for that corner screw until you notice a bit of drag when sliding the paper under it. Continue to the next corner, position your nozzle over it, adjust the screw so you get the same amount of drag.
ii) Platform is warped
When dealing with a warped bed do not try to level your bed at the 4 outermost corners, but pick a smaller area in the center of the build plate and try to level it as best as possible there. Idea behind this is, most of the prints seldom require the whole bed, so make a smaller area work well.
Stringing and Oozing
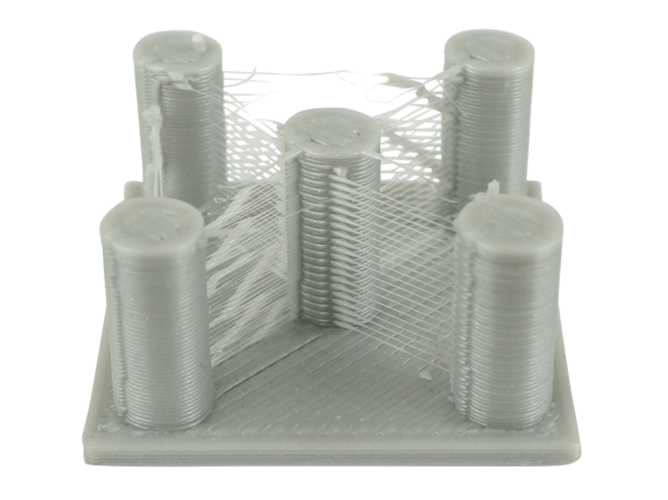
There are bits of filament fraying off your print and some areas of the print will have excess filament where it has oozed. You may also be able to see the filament is very runny coming out of the nozzle. When the nozzle is moving to another location, it could happen that the fluent filament oozes/leaks out of the nozzle and produces the strings.
How to fix:
Increase the retraction distance in your slicer. There’s usually a limit for how far up you can retract filament before you’re running into other issues, but as a general rule of thumb: up to 3mm is ok for most direct extruders, 4-6mm should be ok for long Bowden systems.
Increase the retraction speed. Maximum speed depends entirely on your extruder, so it is hard to come up with a valid recommendation, when in doubt try up to 40mm/s. Check with your printer manufacturer.
Warping
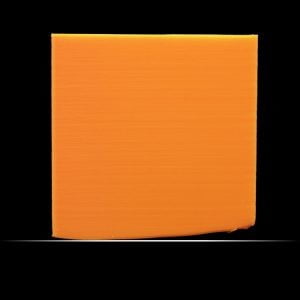
Warping is when corners, or entire parts of the print curl upward due to uneven cooling of your part, or due to improper bed adhesion.
How to fix:
There are several solutions when comes to fixing this. You can try to use a heated bed to help keep the bottom layers of your part warm throughout the part. Alternatively, you can disable any external cooling fans entirely when printing with materials which will allow the layers to stay warm for a longer period of time.

been having problems with bltouch everything goes good up until right after it does the bed leveling before every print i either get a thermal runaw2ay or it just parks at the very last spot where it does the bed leveling upper right hand corner and forces me to re start every time , but what’s weird is ill download like a print tester thing like a retractor test, calibration square, bed leveler print from like the store at cura or something and it will print that no problem but when i try to print something i just sliced it does the other where it forces me to restart or there is a thermal runaway, can someone help me i dont know what yo do , im really green when it comes to computers in general let alone all this , for some reason i feel like it has something to do with the code I’ve been putting in to my cura slicer, some one please help me im about to give up
Anytime mate